


In order to be more familiar with my resin products, I am going to review usage and specification of my products here. I recommend you to study these explanations to know about my products more exactly. These products are designed according to your requirements and are so practical and common.
1- Specifications of my resin products
2- The common usage of my resin products
3- The techniques of my resin products
My resins have so beautiful designs, various colors, different sizes and are so suitable for any decoration of your homes and your offices or even for a gift to a friend. The materials which have been used for them are of the highest quality and performance. They are very economic and affordable which can be ordered according to your request. I would be pleasure to know your opinion about my resin products or any question about your orders.
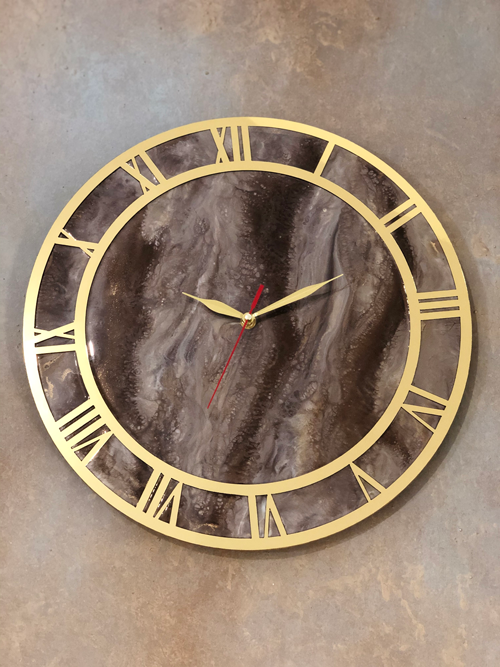
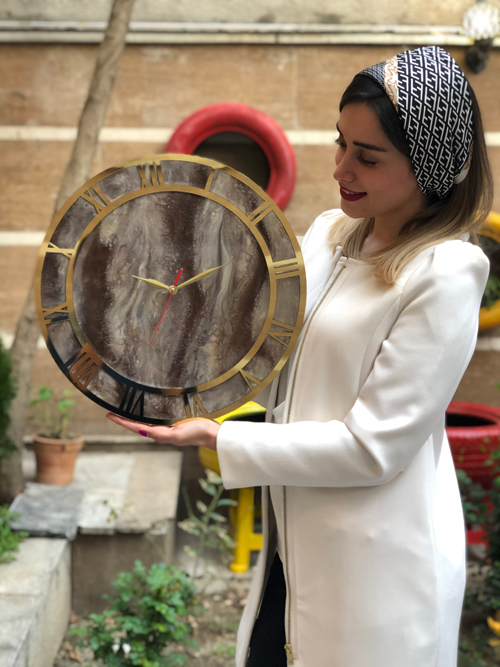
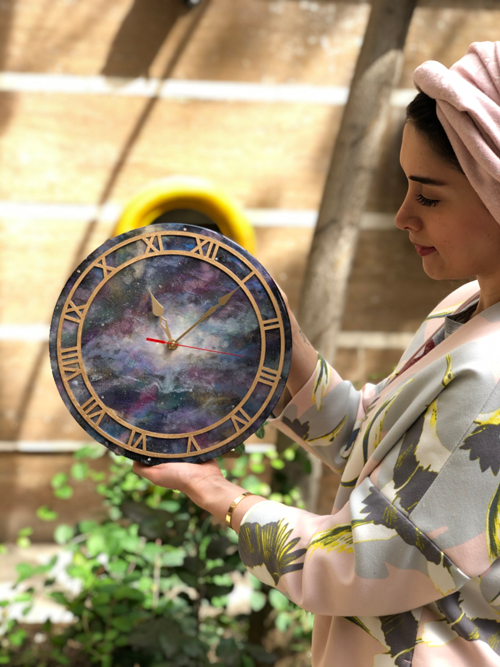
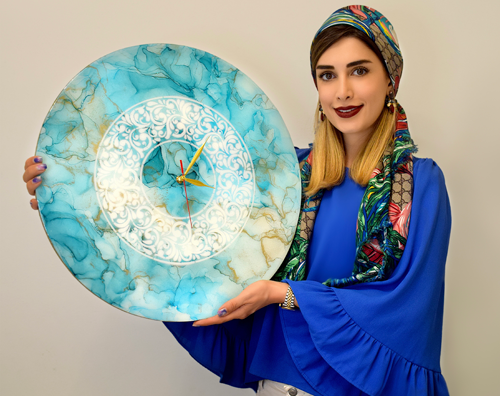
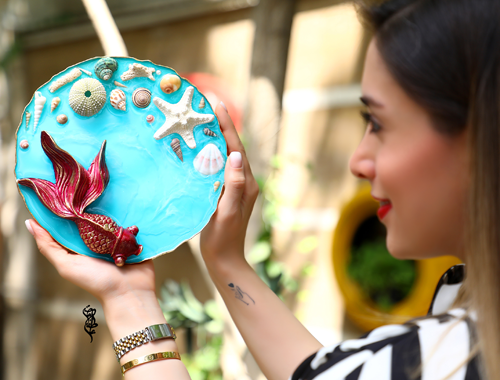
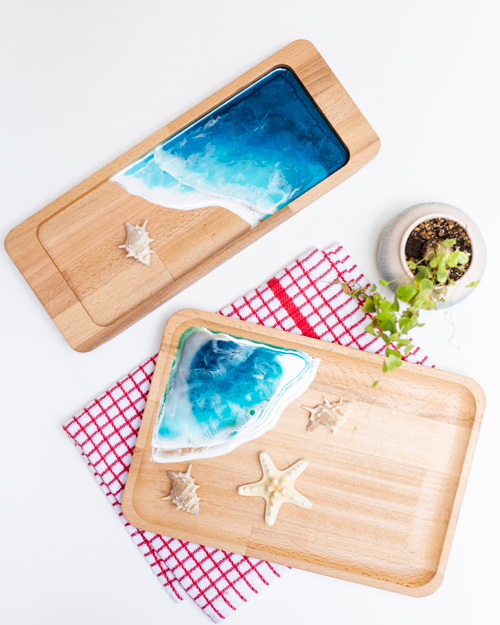
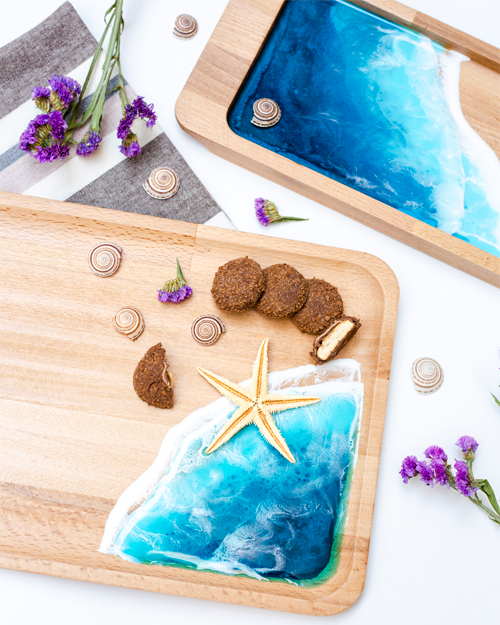
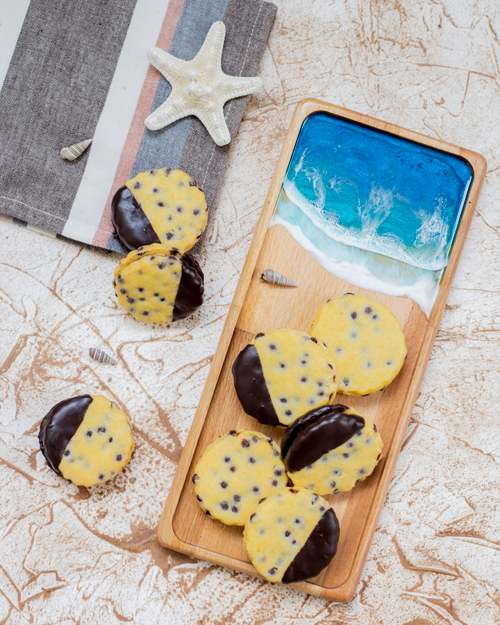
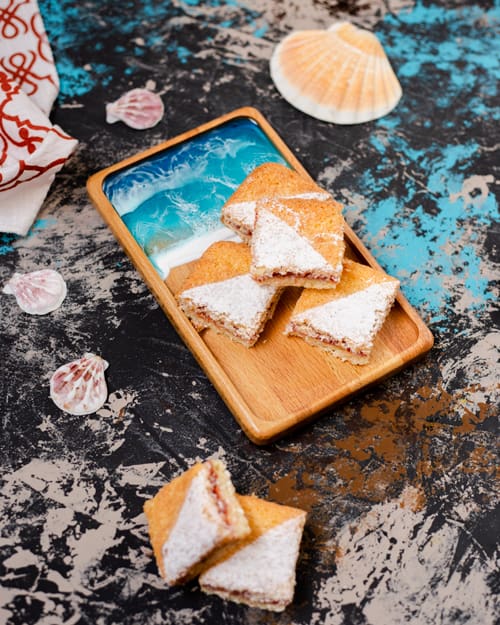
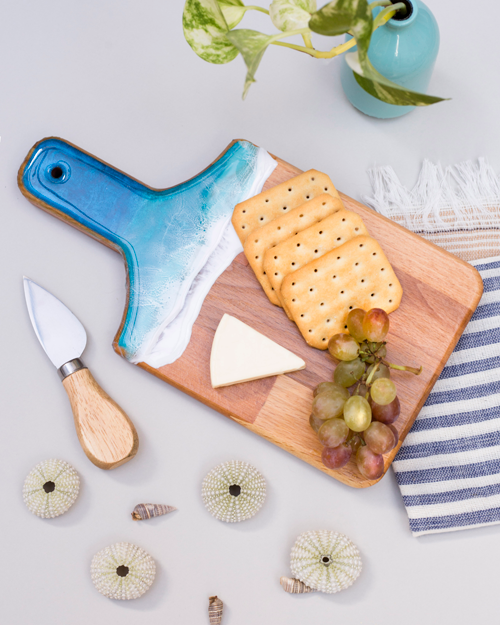
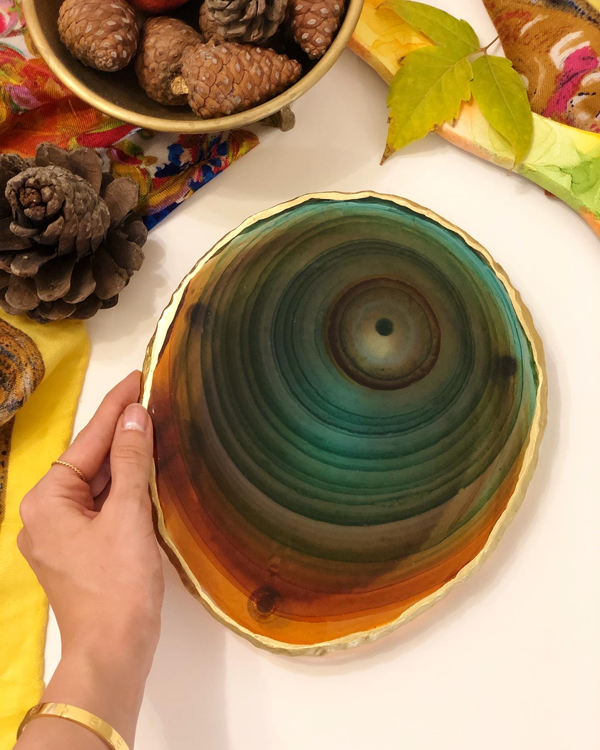
These products have so many usages in everyday life. They are in forms of simple and luxury dishes, cup coasters, serving boards, holders, clocks and beautiful agate artworks. My products of dishes include colored confectionery dish, transparent confectionery dish, nuts dish and fish designed. My serving boards include cup coasters, food serving boards, tea serving board and trays. I have also beautiful clocks in size of small, medium and large. The holders includes key holders which can set with clocks according to your request in design and color. Other holders include beautiful jewellry holders in sea design. Also my agate and geode artworks are so beautiful.
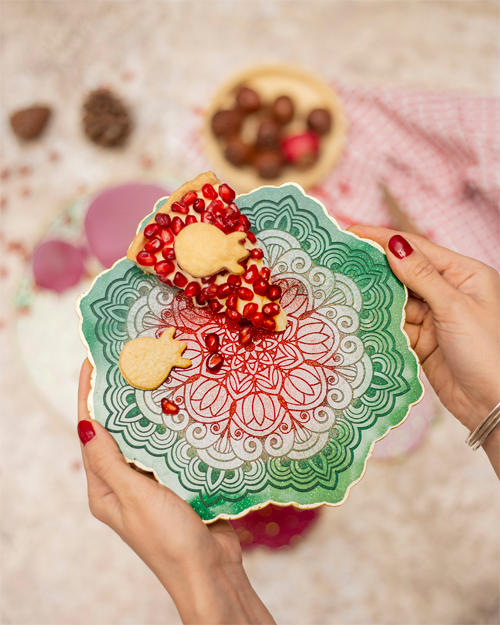
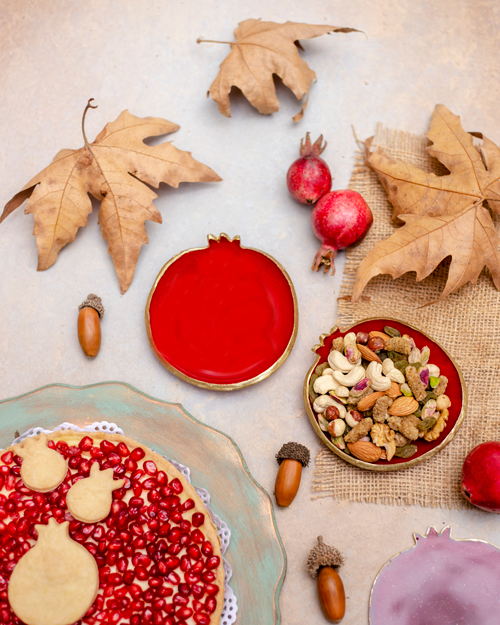
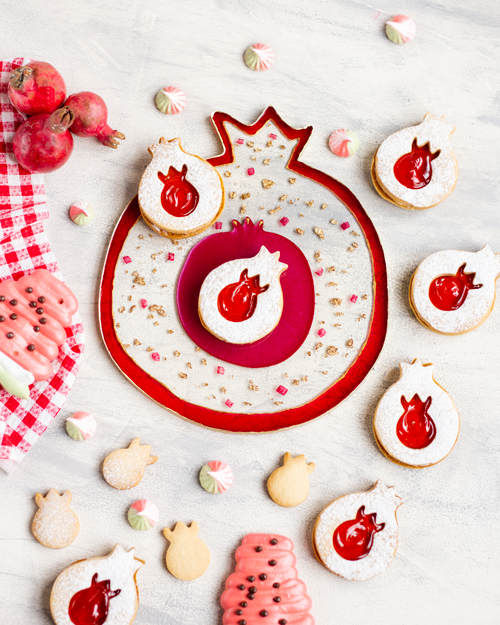
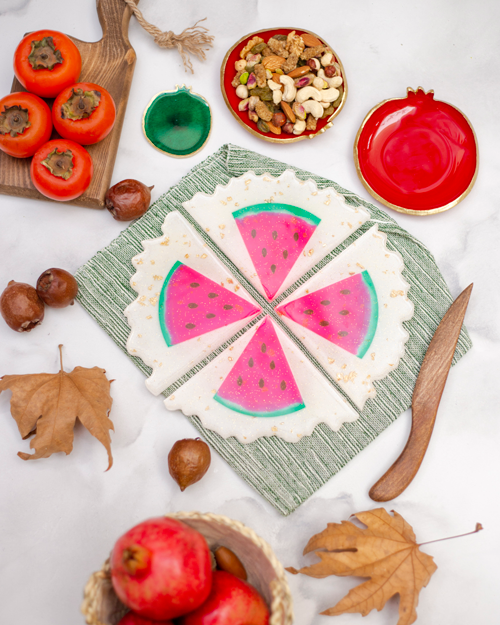
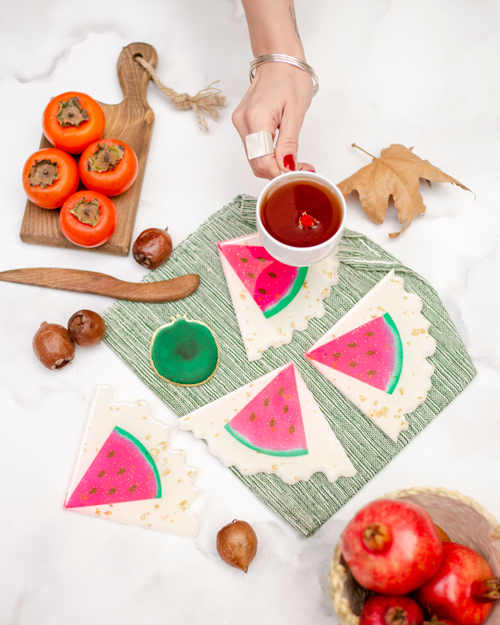
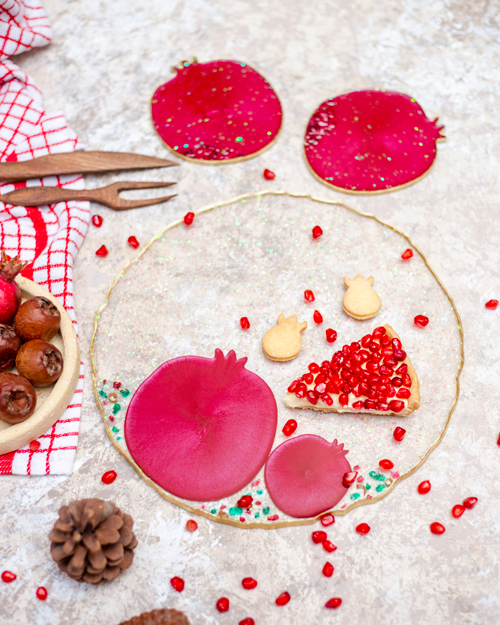
Yalda night celebration is a kind of ceremony in Iran country for the longest night of the year which is carried out in the last night of autumn. People in this night eat pomegranate fruit of winter with a summer fruit of watermelon to give warmness and kindness to winter and pass this long night in happiness. I hope you would like my resin dishes and products of watermelon and pomegranate which have been designed for this celebration.
My resin products of Yalda night celebration include pomegranate designed dishes for nuts, confectionery dishes and so beautiful cup coasters all in resin and in various designs. They can be transparent or in red colored designs according to your requested sizes, also they are so practical and so beautiful. Because of competitive prices and good quality, all of my products are so suitable choices to select for gift.
Techniques of our resin products include agate, geode, sea technique, galaxy, alcohol ink and stone designed technique. There are also other techniques for resin such as abstract resin technique, painting resin on wood and photo resin technique. Here we explain about these methods.
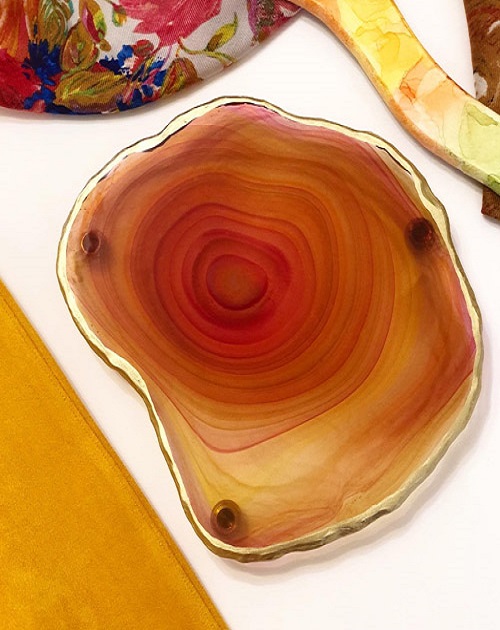
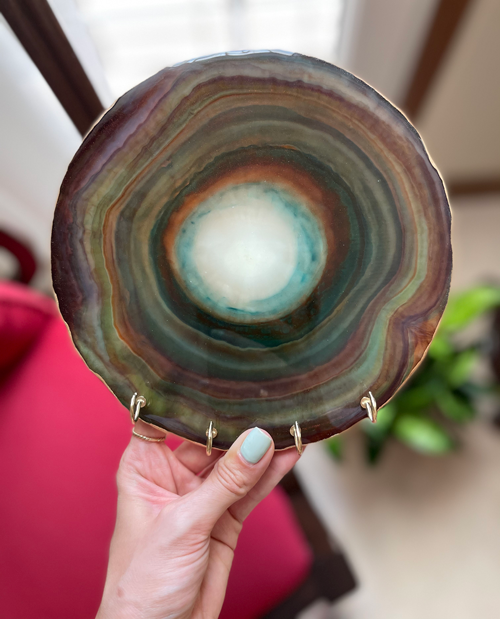
I have used agate and geode techniques of resin in my dishes and decorative artworks. These two techniques are retrieved from natural stones of agate and geode and have completely different methods in making. Here I explain these methods.
For agate resin, something which is important is color. We must prepare one especial brown color which will be near to natural color of agate stone. For this purpose we need some base ink colors of green, red, yellow, metallic brown powder color and also white paste color. Now we pour a very little metallic brown color in disposable plastic cup and add to it the ink colors of yellow, red and geen. We use 40 yellow drops, 10 red drops and 3 or 4 drops of green color and mix them. Now the main color is ready and it should be a yellowish brown.
At this stage we need to make four cups of resin with four different colors. Light yellowish brown resin, dark yellowish brown resin, white and transparent resin. So at first we need to prepare resin and hardener solution and then add colors to it. For more information about making this solution please refer to my explanation in my blog article resin art. Now with this resin we can make dark yellowish brown color, light yellowish brown color, white color and also we keep the rest of resin for transparent color. For white color we should add our white paste color to resin in very little amount, because paste is so heavy and we need very dilute color.
Natural agate stone has several concentric circles on it which start from center of the stone towards the edge of the stone. So we try to pour our colored resins in silicone mold exactly the same as natural stone one by one. But in what way? Firstly we pour our dark colored brown resin at the center of our mold as a circle shape then pour some of our transparent resin on the center of first circle gently. We observe that the both layers open slowly then again continue with pour dark brown in the center of second circle and we repeat this way three times.
Now we pour our white resin color in the center of last circle, then continue with our light brown resin and again add white resin to center of circles and repeat this way for several times. We observe that our resins reach to the edges of our mold. If there is empty place in some part of the mold, we can again create a smaller concentric circle on this place. Now our work is ready and after 24 hours we can remove it from the mold.
For Geode technique we need powder color, metallic powder color, white and colored crystal chips in small and large sizes, epoxy resin, hardener, MDF or painting canvas. MDF or painting canvas are the surface of our work and we should make them level on our table of work and also put them on four plastic objects to come a little above our table.
At first we put some large white crystal chips on several parts of the surface of our work and try to make them an especial shapes like circle, semicircular or shape of curved lines or something like that with our hand or with a help of a painting brush. Now we must put some small colored crystals exactly around the initial shapes in our resin art.
At this stage we should make our resin solution of half resin and half hardener and mix them in one disposable plastic cup. We must pour this solution of resin on the crystals very gently in some parts and allow to the resin to open on all crystals slowly and make them stick to the surface of our work. After several minutes, we can pour some colored resin around the external edges of small crystals. For a beautiful work, the color of this resin must be as exactly as our colored crystals.
After this step, we must fill the empty places of surface with white resin layer by layer and this step must be done very carefully. And then we can remove bubbles of our resin with a torch gently. We can make one metallic resin with metallic powder color in our interested color which is in harmony with the colors of our art piece. Then we must pour this resin inside one nylon bag and push the resin to the bottom of it and make a hole in the bottom of this nylon bag. And then with this nylon bag we can pour colored resin in shape of curved lines across the work for decorate it. Now our work is ready and will be dry within 24 hours.
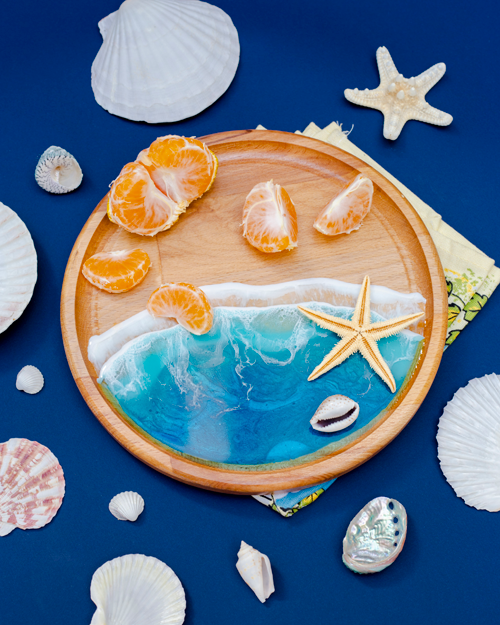
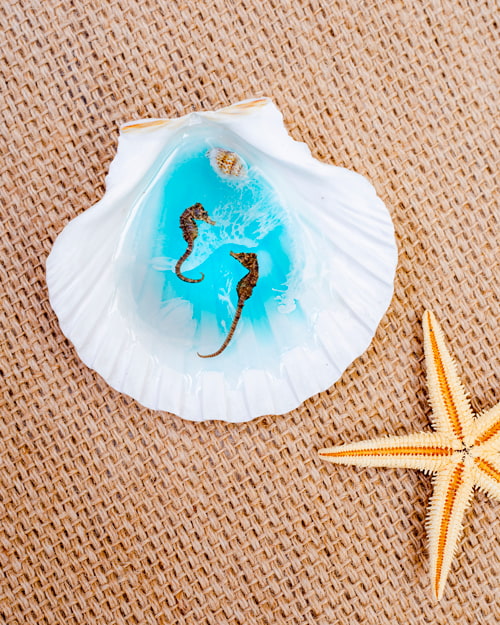
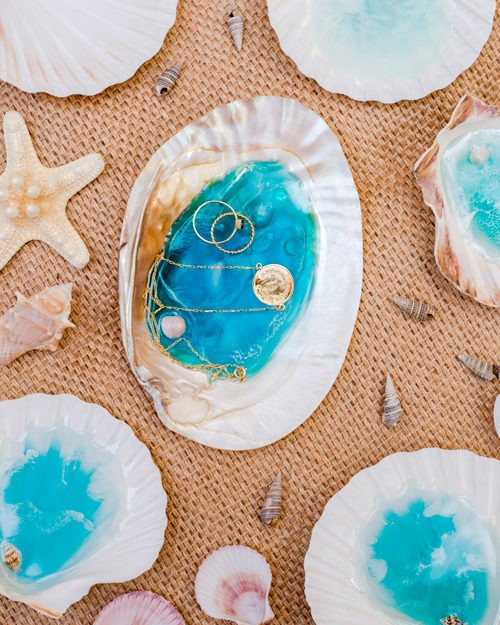
I have used the beautiful technique of sea in my products of cup coaster, serving food boards, trays, jewellry holders and key holders. Here I explain about this method.
For this technique we need epoxy resin, hardener and some paste colors such as white, light blue, dark blue and cream. We use paste colors because they are harder and thicker so more suitable for this technique. First of all, we prepare our resin solution with one part hardener and two part resin and mix them. Then add the colors of dark and light blue, white and cream to resin solution to make separate disposable plastic cups of these colors.
Then we pour the cream resin at one side of our work surface in shape of seashore. We can add shells and sand to it to make it more natural. Then add the light and dark layers of resin to the main work surface. At this stage we pour thin white layer of resin on light and dark blue layers and make waves of the sea with the help of a heat gun. It means that we push the white layer toward the inside of the blue layers with the blow of the heat gun. Now the work is ready and will be dried after 24 hours.
I have used these three techniques in my resin products. I will explain more about these techniques and other methods of resin artworks in my future articles. Also you can study my explanations about resin supplies, the methods of resin blending and curing of resin in my blog of resin art.